Home
How to Defeat Arch-Tempered Nu Udra and Craft the Gamma Armor Set
To defeat Arch-Tempered Nu Udra in Monster Hunter Wilds , you must reach Hunter Rank 100 and equip a Water-element weapon (Mizutsune or Artian lines). The encounter requires Adaptability Level 2 to negate fire floor hazards and Guard Up Level 3 to survive the "Oil Bomb" one-shot. Focus your efforts in Area 14 to utilize environmental stalagmites and the hidden Sleep Toad for massive damage windows.
- Weaknesses & Requirements
- Counter Builds
- Dangerous Attacks
- Area 14 Loop
- Follower Support
- Gamma Armor Analysis
- A-Rank Tips
- FAQs
The arrival of Arch-Tempered Nu Udra represents a significant milestone for endgame players in Monster Hunter Wilds . As a 9★ threat located within the volatile Oilwell Basin, this monster serves as a gatekeeper for some of the most specialized equipment in the game. Unlike its standard tempered counterpart, the Arch-Tempered variant introduces aggressive new tentacle combinations and a devastating "Oil Bomb" mechanic that can end a hunt in seconds.
Players can engage this beast through two specific quests: the permanent event “Be Cursed, Ye Shadowy Flame” and the high-stakes challenge “Burn in Blackest Hell.” Success requires more than just high defense; it demands a deep understanding of environmental triggers and specific skill thresholds that transform a punishing slog into a manageable tactical encounter.
What Are the Key Weaknesses and Requirements for Arch-Tempered Nu Udra?
Preparation begins with understanding the monster's physiological vulnerabilities. Arch-Tempered Nu Udra is heavily susceptible to Water damage , making weapons from the Mizutsune or Artian trees highly effective choices. While it possesses minor weaknesses to Ice, Water remains the primary choice for maximizing damage uptime, especially when targeting the saturated oil sacks on its underbelly.
The fight takes place in the Oilwell Basin, a region defined by its shifting terrain and hazardous pools. Navigating this area requires constant awareness of your surroundings, as the monster frequently ignites the very ground you stand on. According to data from Mobalytics , the quest requires a minimum of HR 100, ensuring that only seasoned hunters with fully augmented gear attempt the challenge.
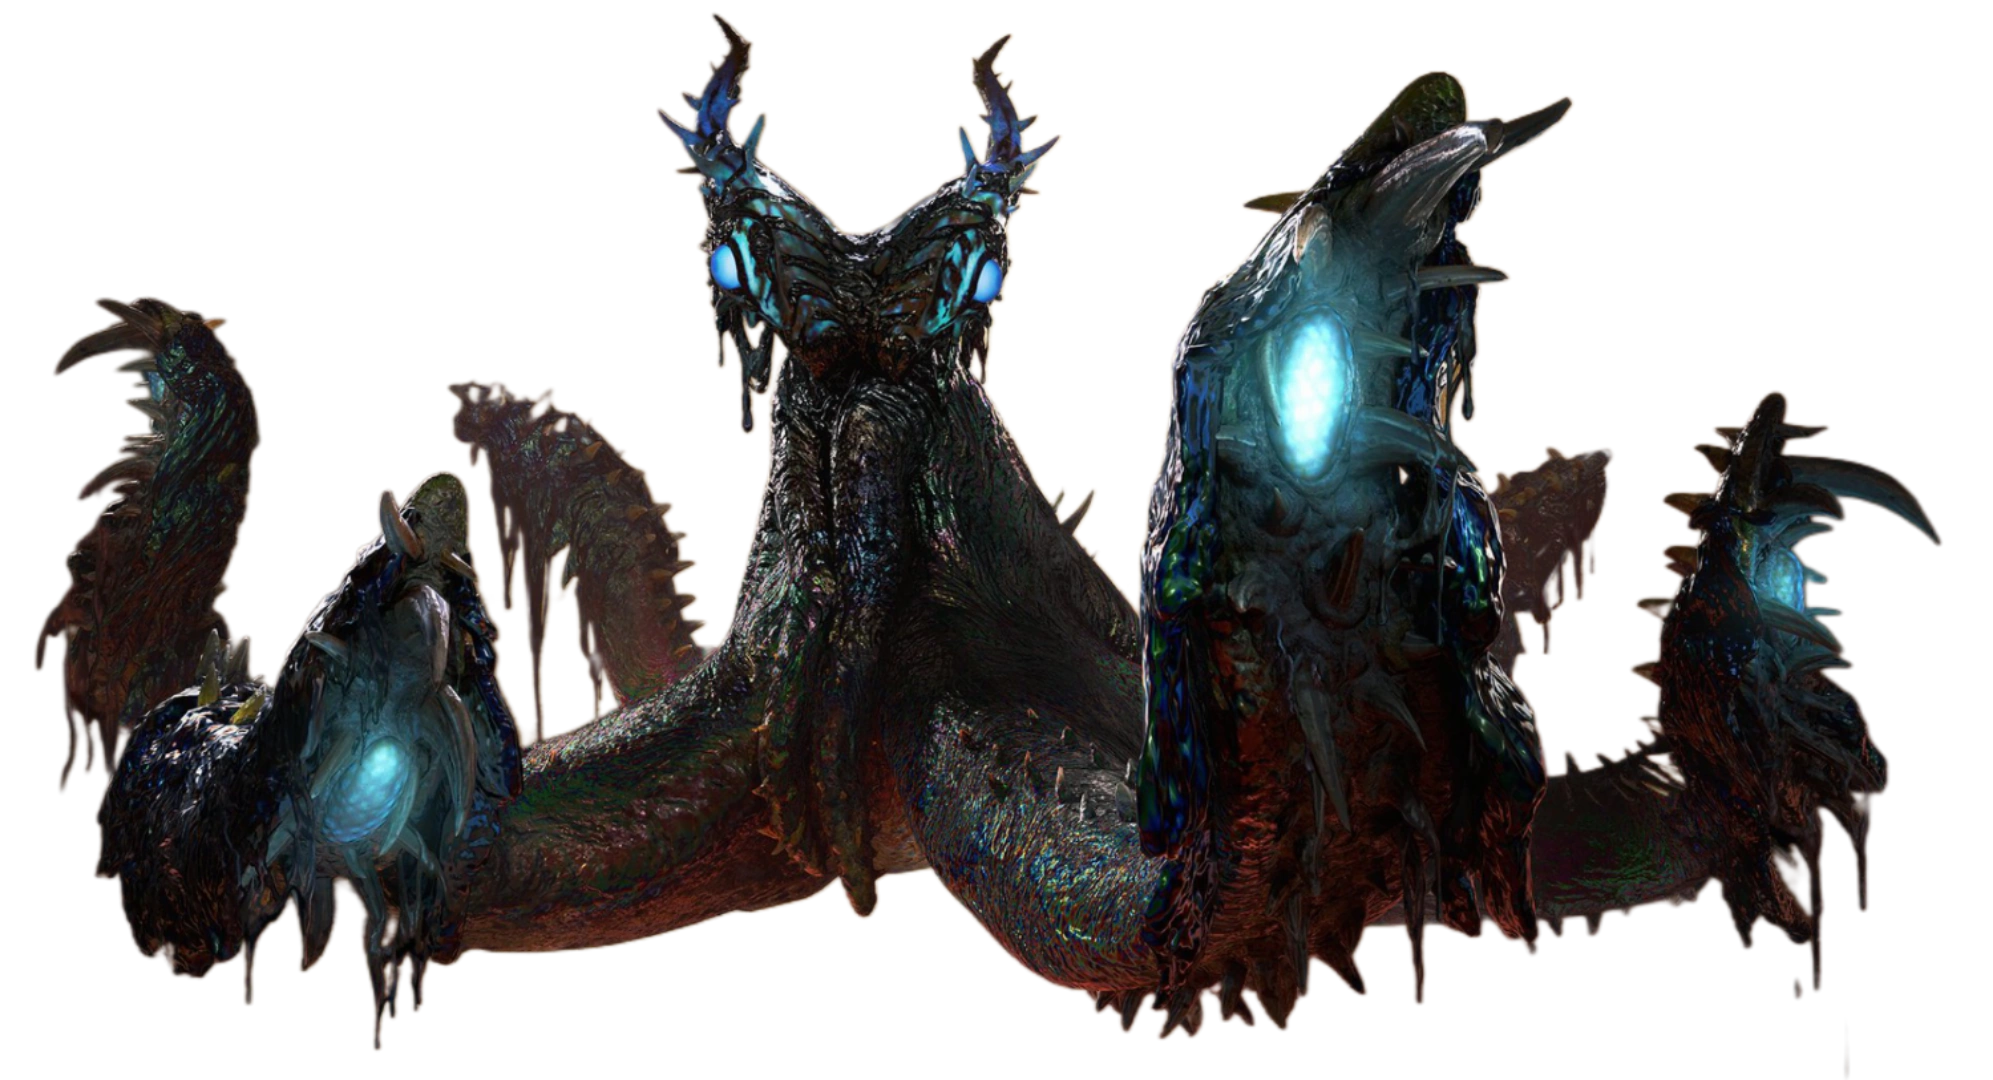
Image source: Monster Hunter Wiki - Fandom
| Hitzone / Element | Water | Ice | Fire | Status Resistance |
|---|---|---|---|---|
| Head (Broken) | 30 | 15 | 0 | Sleep: Low |
| Tentacles | 25 | 10 | 0 | Paralysis: Medium |
| Oil Sacks | 45 | 20 | 0 | Blast: Immune |
| Tail | 20 | 10 | 0 | Poison: Low |
How to Build a Highly Effective Counter Set for This Encounter
Standard meta sets focused purely on Attack Boost and Critical Eye often fall short against Nu Udra due to the sheer volume of chip damage and environmental hazards. To survive, you must pivot toward a build that prioritizes specific utility skills over raw DPS.
Why Adaptability Level 2 Is Mandatory for Survival
The most significant hurdle in this fight is the "Firewall" effect. Nu Udra constantly secretes oil that ignites into persistent fire pools. Without the Adaptability skill, these pools deal rapid tick damage that can deplete a health bar even while you are performing a successful combo.
At Level 2 , Adaptability completely negates the damage from these floor hazards and the monster's fire aura. This is not just a defensive measure; it is an offensive necessity. By ignoring the ground hazards, you maintain 100% uptime on the monster, allowing you to stay positioned under the oil sacks for maximum damage. Many community members on Reddit have noted that failing to slot this skill is the primary cause of quest failure.
Essential Defensive Skills to Prevent One-Shots
Beyond Adaptability, your armor should reach a minimum of 20 Fire Resistance to avoid the Fireblight status. Additionally, for shield-bearing weapons like the Lance, Gunlance, or Charge Blade, Guard Up Level 3 is a non-negotiable requirement. The Arch-Tempered variant's "Oil Bomb" explosion has a massive hitbox that standard blocking cannot mitigate, often resulting in an instant cart if Guard Up is absent.
How to Survive the Most Dangerous Attacks in the Fight
Arch-Tempered Nu Udra is significantly more aggressive than its standard version, featuring reduced wind-up frames and extended combo strings. Recognizing the visual cues for its two deadliest maneuvers is the key to staying alive.
How to Predict and Dodge the Oil Bomb One-Shot Mechanic
The "Oil Bomb" is the monster's signature move. It begins with Nu Udra rearing back while its central oil sack glows a bright, pulsating orange. The monster will then spit a massive glob of oil directly in front of it and immediately perform a back-jump while igniting the pool with a spark from its tentacles.
The explosion covers a wide radius. To survive, you must recognize the back-jump trigger . As soon as the monster begins the leap, dodge sideways or toward the monster's original position. Dodging backward will usually keep you within the blast zone. If you are using a shield, ensure you are facing the center of the pool with Guard Up active.
How to Manage the Triple Tentacle Slam Combo
In its Arch-Tempered state, Nu Udra frequently performs a three-hit slam combo. Each slam tracks the player's position, making simple back-pedaling ineffective. The safest strategy is directional dodging toward the monster's flank . By lunging toward the monster's side rather than away, you move out of the tracking arc of the subsequent slams. Using a Follower like Olivia can also help, as her high stun frequency can often interrupt this combo mid-animation.
How to Execute the Area 14 Environmental Loop Strategy
One of the most effective ways to simplify this encounter is to utilize the "Area 14 Loop." This strategy leverages the environment to deal massive damage and provide long windows for healing or sharpening. This sequence is widely considered a top-tier tactic for solo players struggling with the time limit.
Begin the fight in Area 15 (the Nest). You must deal enough damage to trigger the monster's first zone transition. If you do not deal sufficient damage, it may move to Area 9, which lacks the necessary traps.
Once in Area 14, position yourself under the large stalagmite on the eastern wall. Use a Slinger pod to drop it as Nu Udra lunges toward you. This results in a 10-second knockdown.
Immediately after the knockdown ends, lure the monster over the patch of tall grass near the center. A hidden Sleep Toad resides here. Kick it to put the monster to sleep, then set up Mega Barrel Bombs on the head.
After the wake-up hit, immediately place a Pitfall Trap. While the monster is trapped, use a Lure Pod to pull it toward the second stalagmite on the northern ceiling for a final environmental knockdown.
Which Followers Provide the Best Support Against Nu Udra?
Choosing the right AI companions can drastically alter the difficulty of the hunt. In Monster Hunter Wilds , Followers are more than just extra targets; they provide specific utility that counters Nu Udra's mechanics.
Why Kai Ranks Among the Top Choices for General Support
Kai is a highly effective choice for players who find themselves taking frequent chip damage. His AI prioritizes Life Powder and Wide-Range healing, often saving you from the brink of a cart after a tentacle slam. Furthermore, Kai’s frequent use of Sonic Bombs can occasionally flinch Nu Udra during its oil-spraying animations, providing small but vital openings.
Using Olivia for High Stun Frequency
For players using heavy weapons like the Greatsword or Hammer, Olivia is an excellent partner. Her blunt-force playstyle focuses heavily on the monster's head. Given that Nu Udra’s head hitzones are particularly vulnerable once broken, Olivia’s ability to proc KOs (Knockouts) allows you to capitalize on the monster's highest damage multipliers. This synergy is a significant advancement over standard AI behavior seen in previous titles.
Is the Nu Udra Gamma Armor Set Worth the Grind?
The reward for conquering this challenge is the Nu Udra Gamma set. While the Alpha and Beta sets are strong mid-game options, the Gamma variant introduces two unique skills that define a new niche in the endgame meta.
How the Lord’s Soul Skill Changes Your Playstyle
The Lord’s Soul skill, active when wearing three pieces of the set, provides a powerful "Guts" or "Tenacity" effect. This allows you to survive a single lethal hit with one health remaining, provided your health was above a certain threshold. In a fight where one-shots are common, this skill acts as a vital safety net, allowing for more aggressive playstyles in high-risk scenarios.
How the Bad Blood Skill Synergizes with Greatsword and Charge Blade
The standout feature of the Gamma set is the Bad Blood skill. This skill increases your attack power based on the amount of "Red Health" (recoverable health) you currently have. This creates a unique synergy with weapons that utilize hyper-armor or heavy blocking. Greatsword players using Tackle or Charge Blade players performing Guard Points will naturally generate red health, which Bad Blood then converts into a significant DPS boost. According to analysis on the Fextralife Wiki , this makes the set a top-tier choice for "Red Health" builds.
| Armor Piece | Gamma Skills | Alpha/Beta Comparison |
|---|---|---|
| Head | Adaptability +2, Fire Res +3 | Higher slots, lower base Res |
| Chest | Bad Blood +2, Attack Boost +2 | Replaces Agitator for Red Health synergy |
| Arms | Lord's Soul (1/3), Critical Eye +3 | Significant slot upgrade (4-4-2) |
| Waist | Bad Blood +1, Guard Up +1 | Essential for shield builds |
| Legs | Lord's Soul (1/3), Water Attack +4 | Best-in-slot for Water elemental builds |
How to Earn an A-Rank in the Burn in Blackest Hell Challenge
The limited-time challenge quest “Burn in Blackest Hell” offers exclusive Pendants and cosmetic rewards for those who can achieve an A-Rank clear. The time threshold for A-Rank is typically under 12 minutes for solo players.
Crucially, multiplayer scaling in Wilds significantly increases Nu Udra's health pool. For many, a solo or duo run with optimized Followers is often faster than a full four-player lobby, as the monster's movements become more predictable, allowing for better execution of the Area 14 Loop. Focus on breaking the oil sacks early to trigger "topple" states, which are essential for meeting the strict A-Rank timers.
Frequently Asked Questions
No. Following the tradition of Arch-Tempered monsters in the series, Nu Udra is a "Kill Only" encounter. While you can use Pitfall and Shock Traps to create damage openings, the monster cannot be captured with Tranq Bombs, regardless of its health percentage.
You will need a total of 5 "Shadowy Flame Tickets" to craft the full five-piece Gamma armor set. These tickets are guaranteed rewards from the “Be Cursed, Ye Shadowy Flame” quest, though you may occasionally receive two tickets in a single run if you have the Lucky Cat food skill active.
No. Fire Resistance reduces the damage taken from direct fire attacks and prevents the Fireblight status. However, the persistent fire pools on the ground deal "environmental" damage that Fire Resistance does not mitigate. Adaptability Level 2 is specifically required to walk through these hazards without taking damage.
While many weapons are viable, the Water-element Sword and Shield (SnS) or Lance are widely regarded as top choices for a first-time clear. The SnS offers high mobility and quick item usage, while the Lance provides the safety of a shield to mitigate the monster's aggressive tentacle slams.
According to the official event schedule, the challenge quest is available from October 28th through November 11th. After this period, the quest will rotate out, though the standard "Be Cursed, Ye Shadowy Flame" quest remains permanently available for armor farming.
Key Takeaways for Mastering the Shadowy Flame
Defeating Arch-Tempered Nu Udra is a test of both preparation and environmental awareness. By following these steps, you can consistently clear the hunt and craft the powerful Gamma set.
- Prioritize Adaptability Level 2 to negate the constant fire pool damage and maintain offensive pressure.
- Equip Guard Up Level 3 if using a shield to survive the massive Oil Bomb explosion.
- Lure the monster to Area 14 to chain environmental stalagmites and the hidden Sleep Toad for free damage.
- Use Water-element weapons from the Mizutsune or Artian lines to exploit the monster's primary weakness.
- Bring Kai or Olivia as Followers to provide essential healing or stun support during aggressive combos.
- Focus on the Gamma set for its unique Lord's Soul and Bad Blood skills, which offer a niche meta-synergy for Greatsword and Charge Blade.
Start your next session by checking your Fire Resistance and slotting Adaptability decorations before heading into the Oilwell Basin.